Corporates share information on CoorpID for CDD purposes. This information can be sensitive. Therefore, it is essential that the documents shared are only visible to the people who should have access. To facilitate this, different roles with different permissions are available in CoorpID. These roles are Team Manager, Member and Contributor and Admin. The Admin role can be stand-alone or an add-on to each of these roles.
CoorpID is divided in Business units. A business unit is an environment in CoorpID protected by Chinese walls. The Admin role is applicable on the Business unit level. As Admin in CoorpID, you have additional responsibilities and functionalities at your disposal. Some of these responsibilities and functionalities are shared with the Team Manager role. In principle, the admin role is not time-intensive, but it is essential. Below you can find all the additional functionalities which can be used by the admin role.
The first functionality is to add users to CoorpID. To do this, the following steps are to be taken:
- Navigate to ‘Access Management’
- Select the ‘Users’ tab.
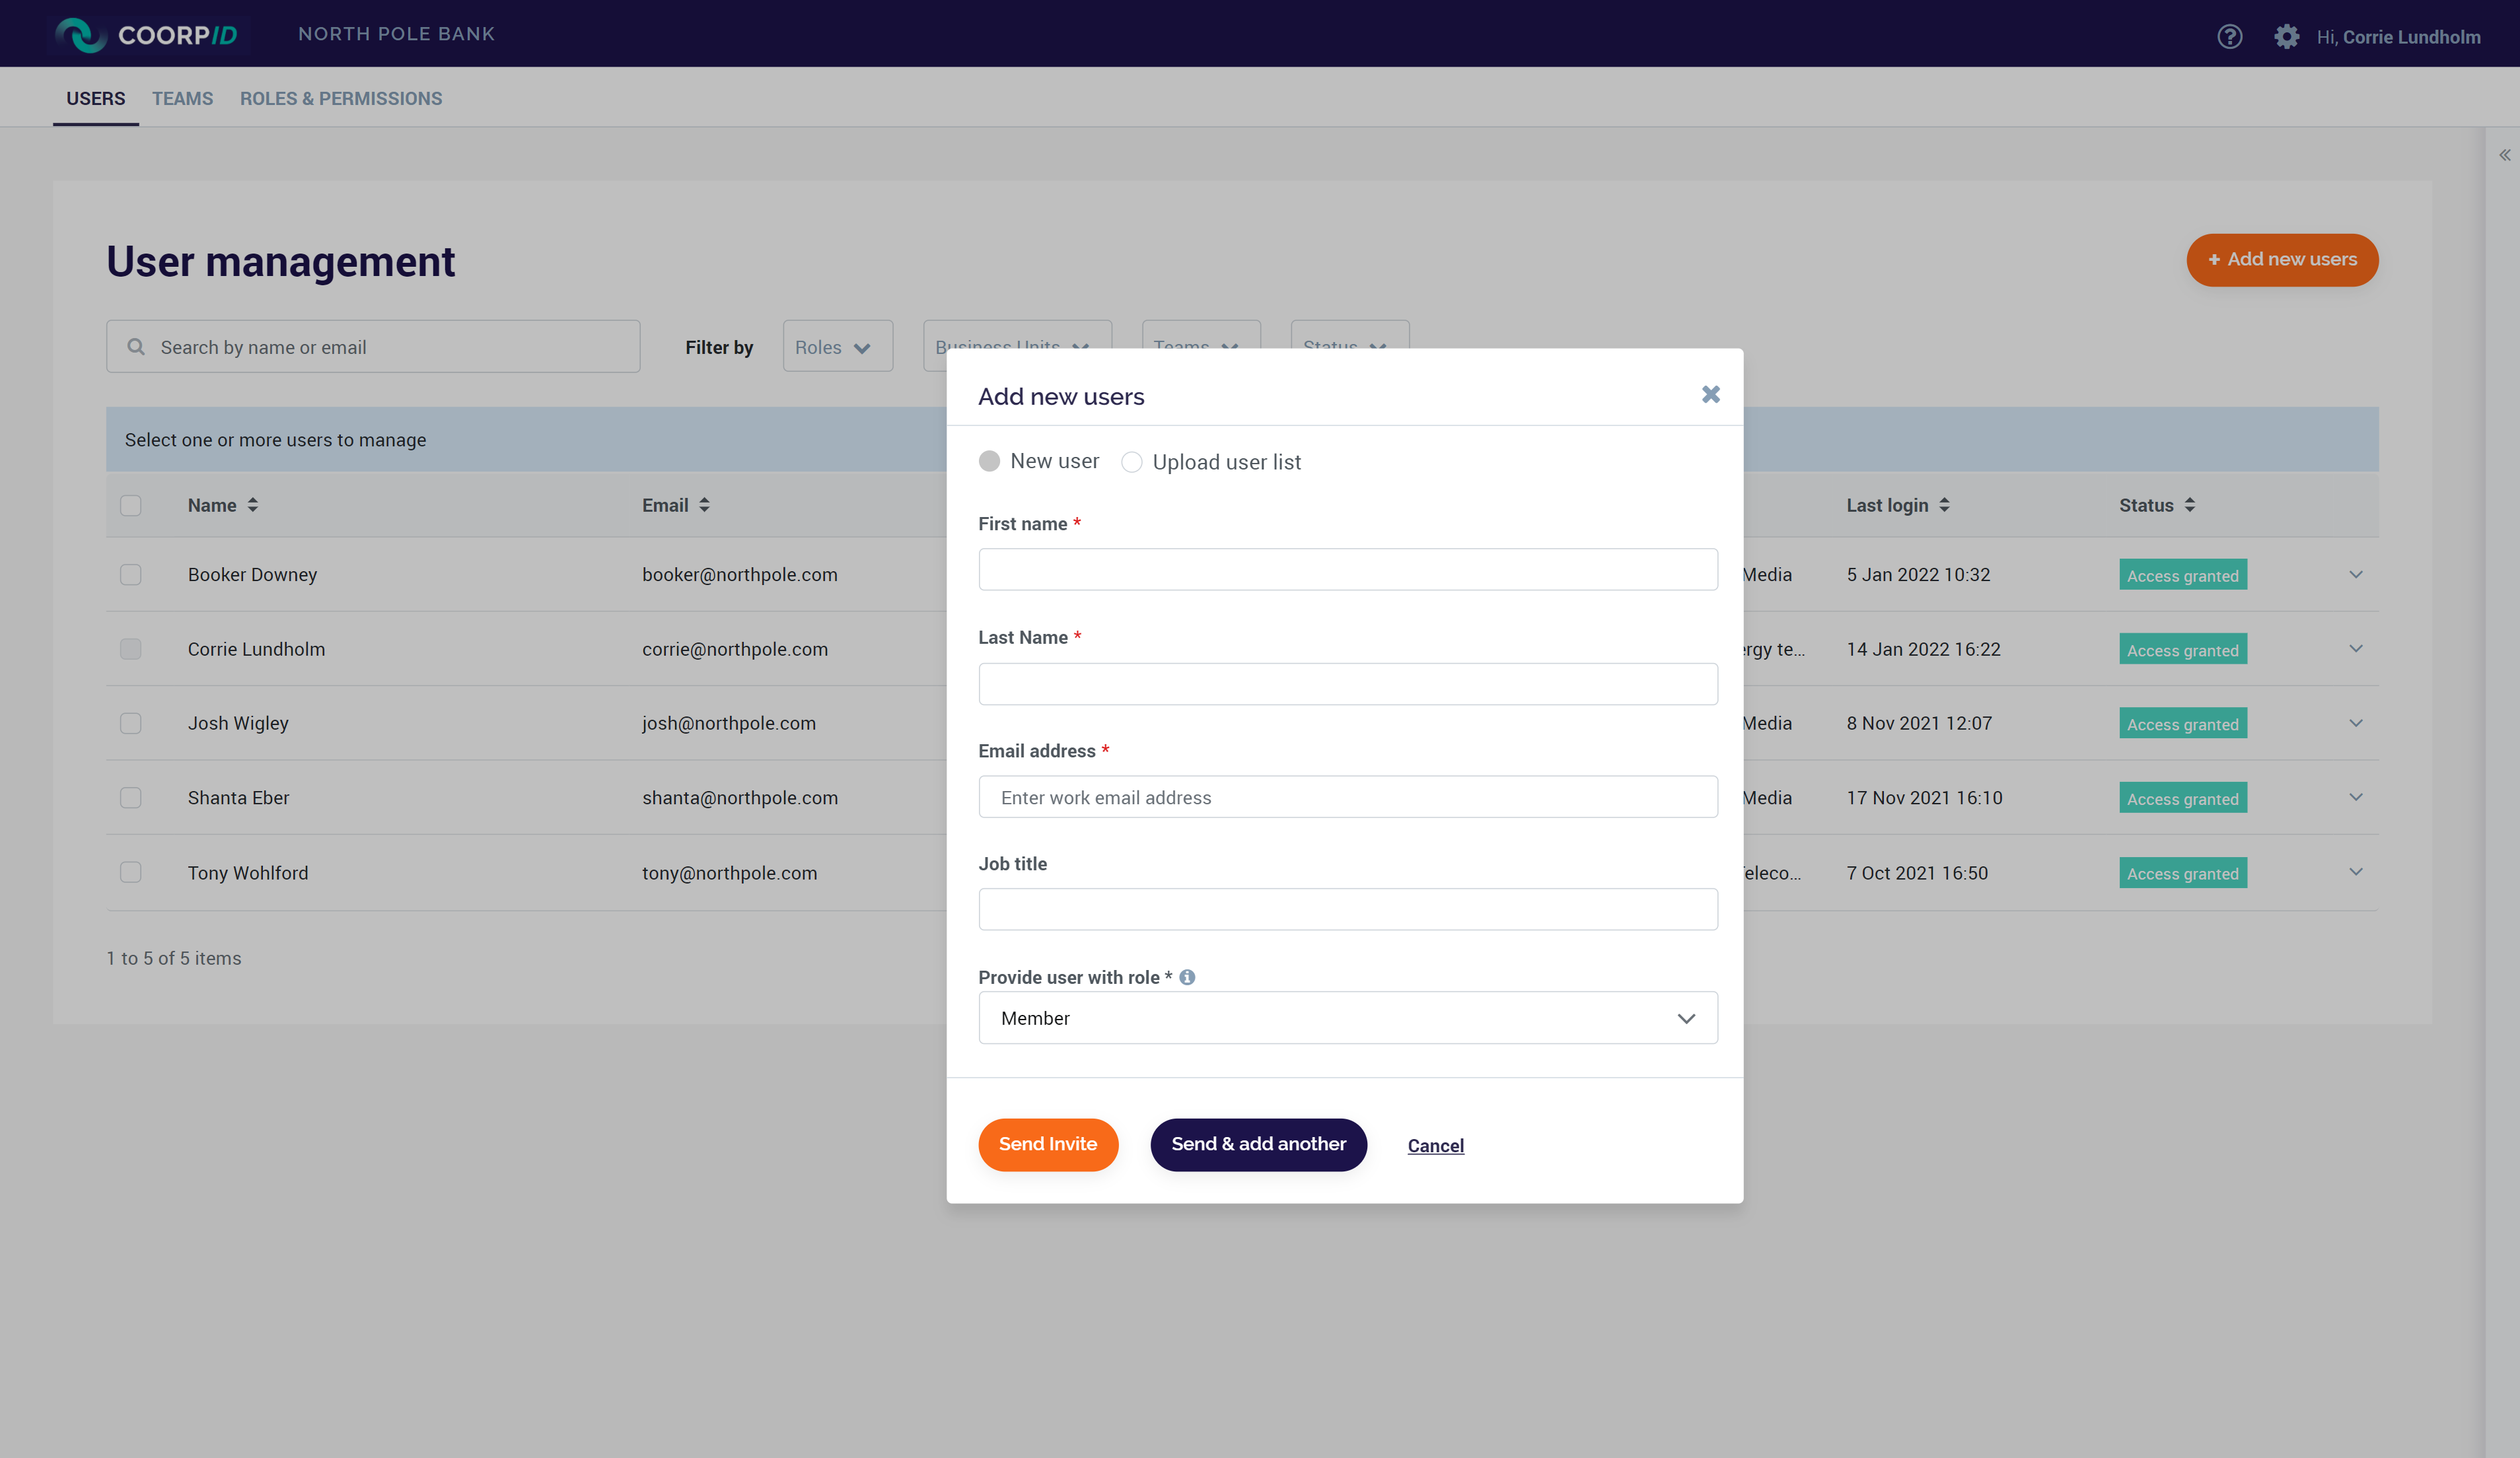
- Use the button ‘Add new users’. A pop-up screen opens. To add one user, the details of the user can be populated, and a business unit and team can be selected.
There is also an option to add multiple users at once. To do this, some additional steps are required:
- Select in the same pop-up screen the ‘Upload user list’ functionality.
- To add a list of users, an Excel document stating in column 1 the first and last name per user and in column 2 the email address of the user, must be uploaded. Tip, download and use the provided sample for the correct Excel format.
- Then select a user role. Note, all the user that are added by means of the same user list, will have the same CoorpID role.
- Now, select the Business units and teams the users should be part of. It is also possible to choose ‘select all Business units’ and ‘select all teams’, to add the users to every team in every Business unit.

Next to adding new users, multiple user management related actions can be performed at the ‘Users’ tab. These actions can be performed on an individual level or in bulk. These actions are:
- Add a user to a team
- Remove a user from a team
- Enable access
- Disable access
- Resend invite
- Change role
- Delete user
To perform an action, select one or multiple users and choose the action you would like to perform.
Another functionality is that you can create (and delete) teams. A team is protected by Chinese walls and through this team, clients and partners users are linked. Teams are centered around Parent Relationship Managers. Next to the Parent Relationship Manager, Clients, Local Relationship Managers, associate Relationship Managers, and KYC specialists are part of a team. The partner users can only access the documents of a corporate client who is also part of this team. A team is created by following these steps:
- Navigate to the ‘Access management’ menu
- Select the ‘Teams’ tab.
- Use the ‘Create new team’ functionality. Here you can enter the name of the team and enter the e-mail address of the Team Manager. As mentioned, the team manager is assigned to Parent Relationship manager (or delegate). They are responsible for adding other (Front Office) partners users and their clients to the team.
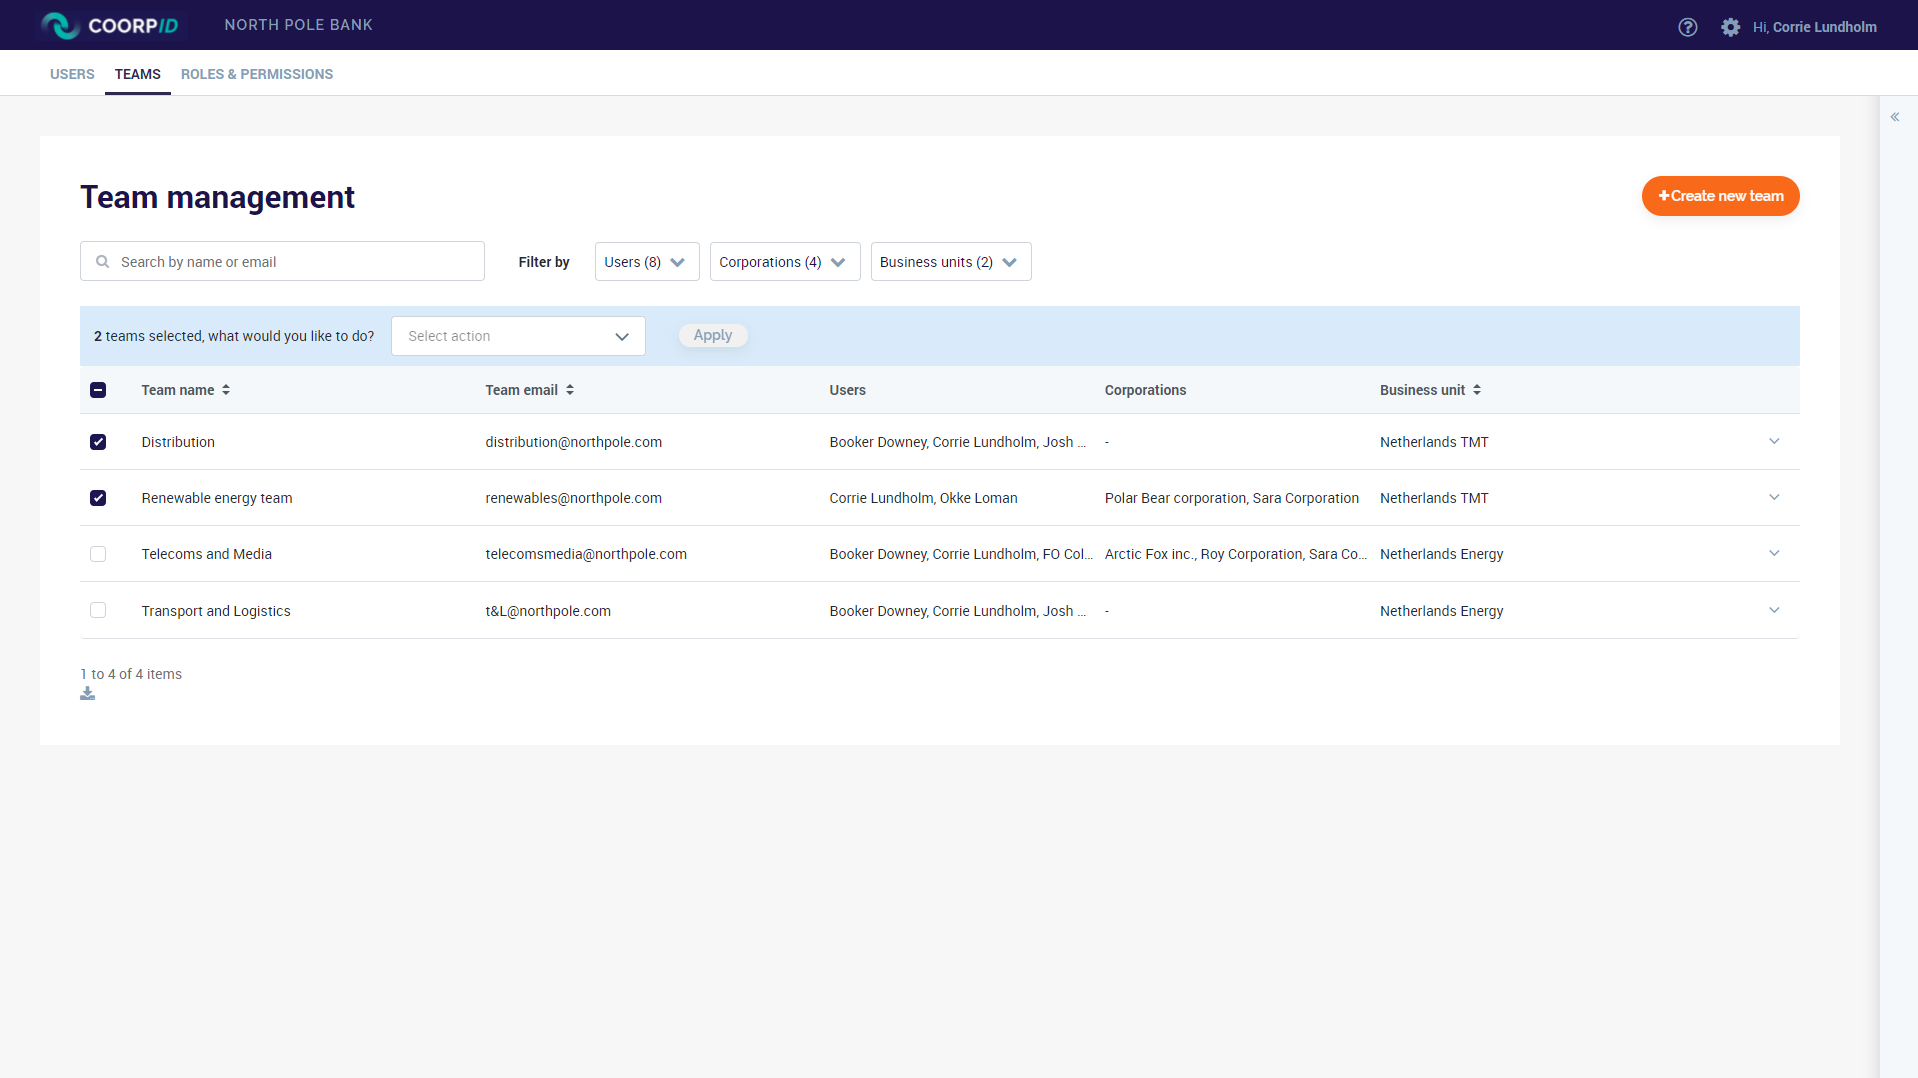
In the ‘Teams’ tab, also multiple bulk actions are possible. For instance
- Adding (multiple) users to a (or multiple) teams
- Removing users from one or more teams
- Add and remove corporations to one or more teams
- Edit and delete teams.
To perform one or more of these actions, select the teams you wish to perform the action on, and select the action.


